



One common occurrence across all of padel is that the good majority of players almost never practice! Therefore, when players try to learn a new skill, they tend to just go straight from beginning that skill to match play. I get it, padel is all about having fun, but if you really want to improve as a player, you have to put in that extra work! Match practice is crucial to developing as a player, but not when working on new technique!
During a match, the ball is moving fast. Speed, height, depth, direction, and spin change continuously. And at the same time, you must read the bounce whilst moving into the correct position. With the focus solely on staying in the point, there really is no space to work on new techniques. This is why players who only practice through match play often develop poor technique. Their strokes have been shaped under “pressure” rather than built through focused, controlled practice.
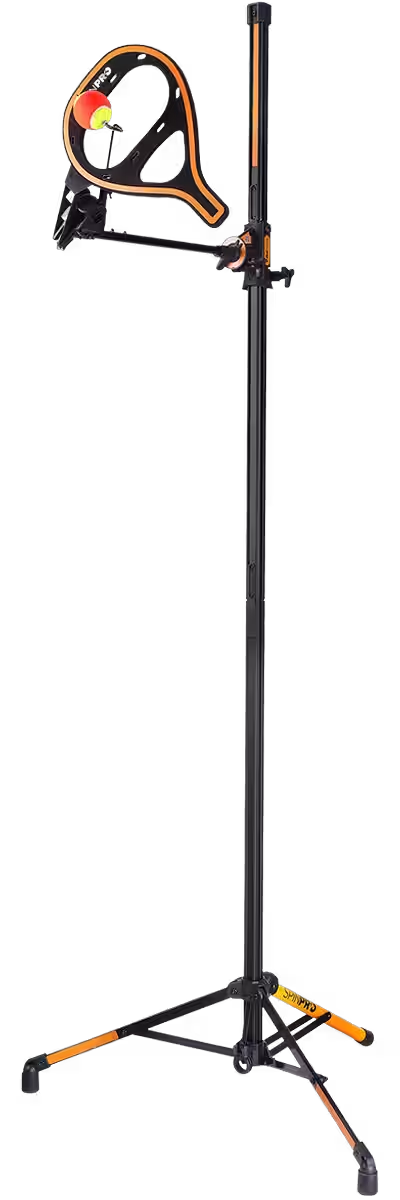
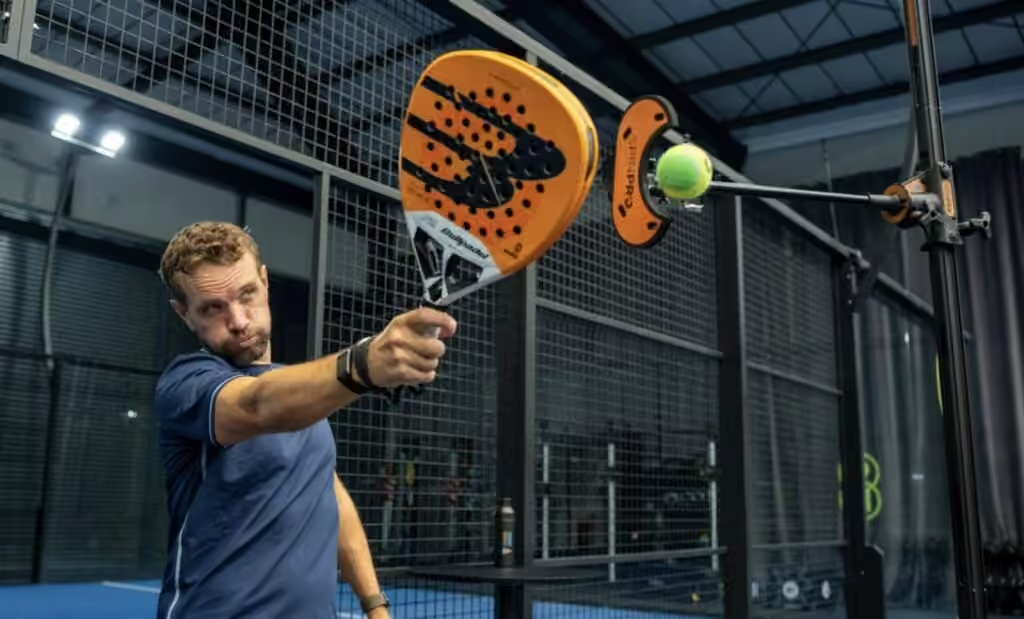
This is where isolating a skill is key. Using the Padel SpinPro helps you remove that pressure, and you can 100% focus on your technique. It gives you the opportunity to work with a static ball and therefore break down your swing, understand the correct contact, and feel how the racket should travel to the ball.
The Padel SpinPro isn’t only for developing spin. It can also help you improve your spacing, contact point, swing path, racket angle, kinetic chain, body rotation, footwork, and ability to watch the ball through contact.
Once you can perform the skill consistently with the SpinPro, the next step is to transfer it to a moving ball. From there, you can gradually introduce more movement, decision-making and pressure until you can apply the skill confidently during match play.
In this guide, we’ll take you through an effective progression for learning and practicing any skill, from isolating the movement with your SpinPro to using it successfully in drills, points, and competitive play.
Before You Practice
Before every session, take a moment to ensure you will practice with purpose. Be clear about what you want to focus on and how you’ll structure the session. It’s also important to check that your equipment is set up correctly so you can practice safely, effectively, and with good technique.
Equipment
If you are using the SpinPro for your practice, check that you have set it up correctly. Secure the ball arm with both knobs and select and attach the correct screen. Position the SpinPro in an area with plenty of swing space and a stable surface.
Technique
Ensure you know the correct technique before practice. Hitting 100s of reps with the wrong technique will only create bad habits. For more guidance on your technique, make sure you have watched our Academy Training Videos.
Target Practice
At every stage of practice, except Stage 1, you should have a clear target area. This might mean intentionally hitting in a particular direction or using cones or court markings to create a specific landing zone.
As you become more consistent, gradually increase the difficulty by changing the target direction, reducing the size of the target area, or alternating between different targets. This helps you progress from simply producing the correct technique to controlling and varying your shots with purpose.
The 6 Stages Of Practice
As you become more consistent, gradually increase the difficulty by changing the target direction, reducing the target area, or alternating among different targets. This helps you progress from simply producing the correct technique to controlling and varying your shots with purpose.
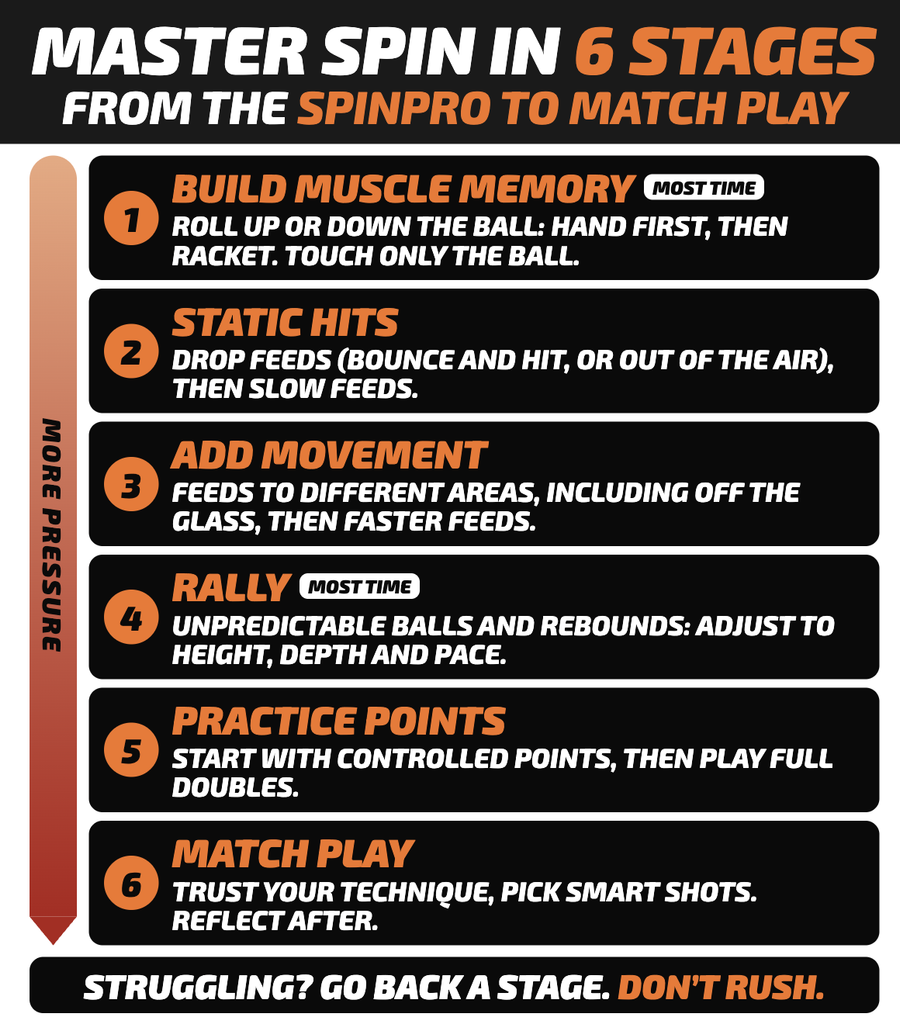
Stage 1 – Building Muscle Memory With The SpinPro
This is the foundation stage for building a new technique. It is where you want to spend a good amount of time ingraining the correct muscle memory before progressing to the next stage. If you move on too soon, you will struggle to retain the technique under pressure. It wants to reach a point where it becomes natural, and you don’t have to think about it anymore.
Progressing Through Stage 1
It is important to start from the point of contact when learning a new technique. This is the most important part of any tennis shot, as it determines where the ball goes. If your contact point is wrong, it doesn’t matter about the rest of the swing. To find more details on individual shots to practice, head to our Academy. Here are all of the settings that you might need to set up your SpinPro:

Hand – You can use the palm of your hand to begin with. This makes is easier to visualize and feel how the racket should move in relation to the ball.
Racket – Once you add the racket, begin each shot from the contact point and really build up that feel for rolling the ball.
Screens On vs Screens Off
The screens are designed to guide your swing and contact point to apply the correct spin. Whenever you are working on your spin technique, keep the screens on. Once you feel more comfortable with your swing, you can make your practice more varied by removing the screen and its holder. But if you are working on your technique, keep them on.
Stage 2: Static Hits
The next step is to add in a ball and get a feel for hitting it over the net and into the court. This is all about learning to apply the technique whilst controlling the ball into the court. The easiest way to do this is to use a drop or a toss feed. You can use no bounce or a bounce depending on the shot you are practicing. For example, you would drop-bounce a slice forehand vs. toss it for a bandeja.
Drop/Toss Feeds
1 – Alternate Between SpinPro and Feed – At this point, you want to stay alternating between hitting on the SpinPro and drop/toss feeding yourself the ball. Any number is fine, e.g., one on, one off, or 5 hits on and 5 hits off. Whichever works for you. The most important thing is that you keep going back to SpinPro to reinforce the correct swing shape.
2 – All Drop/Toss Feeds – Once you start to feel confident with your technique, you can switch to all hits with the ball. Don’t forget to add in some target hitting!
Easy Feeds
Next, have a partner toss you some easy feeds. They should be easy enough that you still stay in a static position and don’t need to move your feet. This is more challenging than a drop feed because the ball is now traveling towards you. Then gradually increase the difficulty by moving them further away from you and throwing the ball slightly faster.
Stage 3: Adding Movement
This stage starts to add some footwork, so don’t move on to it until you are consistent with the static feeds.
Easy Feeds with Movement
For this stage, you need a partner to introduce movement to the ball. Begin with controlled feeds that require only one or two steps, giving you enough time to move into position and maintain good technique.
Once you can perform the skill consistently, gradually increase the challenge by covering more distance. Use quicker feeds and add forward, backward, and sideways movement. This introduces greater pressure and more closely resembles the demands of a real point.
Try to move efficiently and maintain proper spacing to stay balanced. Increase the difficulty only when you can perform the current level with consistent control.
Ball Machine Drills
A ball machine can be particularly useful at this stage, as it provides consistent and adjustable feeds at higher speeds. This allows you to practice maintaining spin at a faster pace, helping you prepare for the speed and intensity of match play.
Stage 4: Controlled Rallying
This stage presents the biggest increase in difficulty. Rallying requires much more footwork and control and exposes you to a huge variety of incoming balls. Changes in height, depth, direction, speed, and spin are continuous.
You must also learn to keep the ball under control so you can maintain the rally. Think of rallying as continuous target practice!
Begin at a comfortable, sustainable tempo that allows you to stay balanced and in control. Increase the pace and difficulty only when you can maintain consistency and control.
This is where you should dedicate the most time before moving on to the next stage. Try to stay patient and expect some initial struggles as you adjust to the unpredictable nature of rallying.
To keep progressing the difficulty, set up targets on the court or aim to control the ball into specific areas.
Stage 5: Practice Points
Advancing a stage beyond rally practice, practice points will bridge the gap before real match play. Once you reach this stage, your technique should be fully ingrained and natural. You shouldn’t have to think about what you are doing technique-wise, only where you are aiming the ball.
Start with structured points that give you repeated opportunities to use the new technique. Some examples are half-court points (especially if you only have one partner), either straight or cross-court. This sharpens your accuracy but also reduces the movement pressure required to begin with. Also, starting points with a steadier feed, rather than a serve, reduce pressure and encourage longer rallies.
After structured points, you can move forward to regular points play with serve. Again, it’s best to keep these points isolated to have a court if there are only 2 of you!
Stage 6: Match Play
The last stage is finally implementing it in a real match! Your focus should be on staying confident and trusting your technique.
Match play brings all that pressure back, so don’t expect everything to work perfectly. You might have multiple matches before it feels like it’s become part of your game. If your technique becomes inconsistent, figure out what went wrong and work on it during your next practice session.
Summary: Don’t Rush the Process
It can be tempting to move directly from the Padel SpinPro into match play! After all, padel is a very social sport! However, technique quality tends to decrease as difficulty and pressure increase.
Focus on progressing through the stages at a steady pace. Even pro players still use slow feeds and isolated practice to refine their technique.
Making practice easier is not a step backward. It gives you the opportunity to correct and reinforce the movement before reintroducing speed, pressure, and complexity. Don’t be afraid to return to an earlier stage whenever your technique begins to break down.
Be patient, prioritize clean and purposeful repetitions, and progress only when you can maintain consistent technique and control. Building a strong foundation will help you develop reliable skills that continue to hold up as the speed, movement, and pressure increase.
FAQs
-
Why isn’t match play the best way to learn a new padel technique?
Match practice is crucial to developing as a player, but not when working on new technique. With the ball constantly changing speed, height, depth, direction, and spin, your focus is on staying in the point. Isolating the skill removes that pressure so you can build the movement through focused, controlled practice.
-
What should I check before starting a practice session?
Be clear about what you want to focus on and make sure you know the correct technique—hundreds of repetitions with the wrong movement will only create bad habits. If you’re using the SpinPro, secure the ball arm with both knobs, attach the correct screen, and choose a stable surface with plenty of swing space.
-
When should I start using targets in practice?
Use a clear target area at every stage except Stage 1. Aim in a particular direction or use cones or court markings to create a landing zone. As your control improves, change direction, shrink the target, or alternate between targets so you’re controlling and varying your shots with purpose.
-
How do I build a new technique with the Padel SpinPro?
Start from the point of contact: use your palm first to feel how the racket should move, then add the racket and build that feel for rolling the ball. Keep the screens on when working on spin technique, as they guide your swing and contact point. Spend enough time here for the movement to feel natural before adding more difficulty.
-
What’s the next step after I can perform the movement consistently on the SpinPro?
Alternate between SpinPro repetitions and drop or toss feeds, keeping the feed appropriate to the shot you’re practicing. Keep returning to the SpinPro to reinforce the correct swing shape, then move to all ball hits with targets as your confidence grows. Next, have a partner give you easy feeds that don’t require you to move your feet, gradually increasing the distance and speed.
-
How much movement should I add to my drills?
Begin with controlled partner feeds that require only one or two steps, and only after you’re consistent with static feeds. Gradually add more distance, quicker feeds, and forward, backward, and sideways movement while maintaining balance and proper spacing. Increase the difficulty only when you can keep consistent control.
-
Why does controlled rallying need so much practice time?
Rallying brings the biggest increase in difficulty because you’re dealing with continuous changes in the incoming ball while trying to keep the rally going. Think of it as continuous target practice: start at a comfortable, sustainable tempo and increase the pace only when you stay balanced and in control. Dedicate the most time here before moving on, and expect some initial struggles.
-
How can practice points help me prepare for a real match?
Structured points give you repeated chances to use the new technique without the full pressure of match play. Start with straight or cross-court half-court points and a steady feed rather than a serve, then progress to regular points with serve. By this stage, the technique should feel natural enough that you’re thinking about where to aim, not how to swing.
-
What should I focus on when I finally use the technique in a match?
Stay confident and trust your technique. Match play brings the pressure back, so don’t expect everything to work perfectly—it may take several matches before the skill feels like part of your game. If it becomes inconsistent, identify what went wrong and work on it in your next practice session.
-
Is returning to an easier drill a step backward?
Making practice easier is not a step backward—even pro players use slow feeds and isolated practice to refine their technique. Return to an earlier stage whenever the movement begins to break down, then reintroduce speed, pressure, and complexity gradually. Be patient, prioritize clean and purposeful repetitions, and progress only when you can maintain consistent technique and control.
Enjoyed this article?
Be sure to sign up for our newsletter and we'll keep you up to date about new posts